The Most Magical Holiday


Hello! I'm spreading holiday cheer with a few of my math friends. Make sure to keep blog-hopping to find more giveaways!

My Favorite Holiday Activity

This year my favorite holiday activity was going to Disney World! I just returned from a three-day "Princess Trip" with my two-year old daughter and my mom - and it was the most magical vacation. I loved seeing Main Street all decorated with holly in the streets and the tallest tree plopped right at the end. My daughter was ecstatic when she caught her first glimpse of Cinderella's Castle and when Minnie Mouse held Elsa's hand while she sang, "Let It Go," it may have been the most exciting moment of her life so far. Something about being inside the bubble of Disney World makes all your other stresses and worries melt away and was just the break I needed to make it through the next five days of school (we are all counting at this point- right!?).


My Favorite Math Activity
The favorite of me and my students have to be my coloring activities. I find coloring to be so relaxing and soothing (and those are two words students don't usually associate with math!). In all my coloring activities, students get to pick their own colors., which means they do not all look the same. I also love self-checking activities, so that students don't practice incorrectly, and the coloring activities have an answer bank included, so students know when to ask for help. The opportunity to engage the right-brain is so important in math class, and I love giving the students a chance to show their creativity. Plus, with the holiday break so close, a few minutes coloring could be just the hook you need to get the kids to do their work and stop asking, "Can we just have a free day?"

My Favorite Teacher Tool 
My go-to daily teacher must-have is a nice strong cup of coffee. I love walking around helping students with their work as I sip it during 1st period. I usually brew my own at home and love to add some peppermint-flavored creamer this time of year. Only once in 10 years have I spilled any on a students' work and it was this year in her interactive notebook, while I was showing her work under the document camera (oops!). Now every time I ask to put her work on the document camera, she says, "Only if you make sure your mug is all the way closed first" 😁

Giveaway
So now it's time for your chance to win a present in a GIVEAWAY! I have a $15 Starbucks gift card that I will send to you via snail mail, and my Algebra Coloring Activities Bundle that you can use to keep your little elves engaged all year!

a Rafflecopter giveaway

Now it's time to hop over to Smith Curriculum and Consulting's blog to enter another giveaway! 
Giveaway ends Monday December 18, 2017 at 8PM EST! 

Building Community While Taking Attendance


Is there anything more awkward for the first day of school than calling the role? Standing with a clipboard trying to put together letters into a way that doesn't butcher too badly the name their parents had in mind, all while the other students listen, laugh. Not only is this embarrassing for me, but it robs my students of valuable class time. So I have created a system that works better for me and helps build community in my classroom.

I tell students from the first day of school that teamwork is essential in my class. My desks are arranged in groups of three and these people are your first resource for anything from pencils to help with the assignment. So I have them turn to their neighbors and introduce themselves. At minimum, you need to know the names of the two people you are sitting with, but I tell them to learn something else about them too.

Then during the work period, I circulate with my clipboard. I pick someone at random in the group and ask, "What are your group members' names?" And the student tells me their names. Then I ask another student the same question, then the last student. At that point, I have heard the students say each name twice, which is plenty for me to mark down the attendance. The kids are also more likely to correct each other (even though I beg them to correct me if I pronounce their name wrong, they are usually hesitant to). The best part is that it builds the classroom culture of relying on each other from the beginning. I have already found that students are way more likely to strike up a conversation about a tricky word problem or ask for help finding a mistake if they know the person's name. It makes me sad when, in December, I ask someone to pass out papers and they tell me they don't know anyone's name. I am going to make a point to rotate the groups too and always emphasize that you need to know the names of your group member ... and rely on them for help. Teamwork!

Why I made Warm Ups extra credit

Warm-Ups were always a struggle for me - I like the idea of having something for the kids to work on immediately, but logistically, I had trouble with motivating kids to do it. Some would take forever to get out a Warm Up journal, some would wait until the answer was on the board and just copy, some would ignore it all together.  After nine years of trial and error, I finally found a Warm-Up routine that I like: 

I create a Warm Up question that will take about three minutes to answer and project it on the board as students enter (it may be review from earlier in the school year or earlier in the unit). I stand at the door greeting students and hand out scrap paper as they walk in. I LOVE recycling, so I just re-use some of the extra paper that I have laying around - old memos, extra copies, and if I ever run low, I just ask in the copy room and they usually have a stack of paper in the recycle bin. Each student gets 1/4 sheet of paper from me as they enter. I also keep an extra container of it on my back table for students who walk in after the bell. 

I usually give students about three minutes after the bell rings to complete the problem, and I give a 30 second warning. They must show ALL work to receive credit, but they don't have to copy down word problems. Then I or a student volunteer walk around and pick them up. But here is the kicker that makes students actually WANT to try it - after students get five Warm-Up points for the quarter, the rest are EXTRA CREDIT! Just the idea of bonus points is usually enough to get students to try even a challenging problem, plus it takes the pressure off if they get one wrong or are absent or tardy to class. 


I can quickly separate the right answers from the wrong and then I make a check-mark on my roster next to everyone who answered correctly. I usually put in Warm-Up grades twice a quarter (once before progress reports and once before the end of the quarter). Students love seeing a score like 7/3 and the bonus points aren't enough to bring up a quarter of slacking, but do help balance out late work or other missed points.

Depending on the nature of the Warm-Up, I may use it to launch into instruction, put a correct answer under the document camera, have a student work it out on the board, or work it out myself. 

Linear Inequalities

I usually teach linear inequalities right after systems of equations, but this year I ended that unit right before Thanksgiving break, then we spent the time between Thanksgiving and Christmas on Radicals and Rational Exponents. Then when we came back in the new year, it was on to polynomials and quadratics. Although I kept meaning to find a few days to fit in linear inequalities, it kept getting lost. Then we had a four day week right after we wrapped up the quadratics unit where it fit perfectly. I actually liked having this topic here for a few reasons: 1. Coming off using the quadratic formula to find irrational solutions, this seemed like a breeze! 2. It was a great refresher of graphing linear functions. I reminded them how we graphed one-variable inequalities on the number line with open and closed circles and then we extended that to dashed and solid lines.

I developed these fun interactive notes for students to practice graphing linear inequalities, writing linear inequalities from a graph and solving word problems involving linear inequalities. Students really liked shading their graphs with colored pencils and markers. We did the first one together, then they graphed the second one on their own and we talked about how to shade together.


With both these problems projected on the board, at least one student in each class would point out that > are shaded above the line and < are shaded below. Just like any other shortcut, we talked about the limitations and specifically how this only works if y is on the left side of the equation. Some of my students liked to use this shortcut and some preferred to test a point. I modeled with testing (0,0).

Next we took on the word problem together, rearranging the equation in standard form to graph it in y-intercept form. Then we jumped to the other word problem and students tried it on their own. These word problems helped my students understand the shading in context.


Then I had the students complete the other problems on their own. I projected them onto the board and had students work them out.


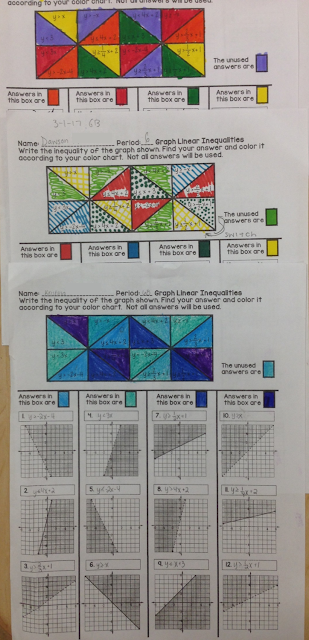
Students practiced with this coloring activity. I love all the variety of my creative students!

At the end of the class, I passed out this exit ticket. {click to download for free!}

After class, I quickly sorted them into those who answered it perfectly and those who made a mistake. I used my single-hole-punch to make a hole in the stack that answered perfectly. At the start of the next class, I passed back the ones who answered perfectly with a student who needed help and had them assist the student in finding and correcting their error. This method has worked really well for engaging everyone and getting students instant remediation.

Giving Kids Time To Be Creative


To say teenagers today are highly-visual is the understatement of the century - they don't even have telephone conversations without looking at the person and spend the majority of their day sending pictures back and forth to their friends - they need visual references that are aesthetically pleasing to look at it. I used to think that any class time used cutting, gluing, coloring, or decorating would be better spent doing another math problem. Then I let the kids actually start spending a little bit of my coveted 90 minutes just being creative, and the results have been amazing! The kids are more engaged in what they are doing, more excited about their notes and work, and have much better retention, but most importantly they are having FUN! Math class usually brings so much anxiety, that any time students say they enjoy my class, I count it as a win. It's a little sad to me that some students say they do more art in my class and in their actual art classes.

My favorite way to ignite their creative side is with these coloring activities. The picture at the top serves as their answer bank, so these are self-checking. Plus the "artist" gets to pick the color for each box - so each one is unique!


When we completed these doodle notes about Mean, Median, Mode and Range, students colored as they took notes and completed the example problems and then I gave them an extra two minutes to add some extra flair -think of it as adding a Snapchat filter ;). Students loved referring back to these notes in their interactive notebooks.

And the students had fun with these Quadratic Formula notes from Math Giraffe too.


Sometimes we will start the class off with a Warm-Up pennant (from Scaffolded Math and Science). I will hand them one of these problems as they walk in and they will solve it and decorate it. It allows me to check their work and do a quick scan of who will need extra help later in the class. Plus it starts things off "low key," and the kids are engaged from the beginning.


Sometimes I use these pennants as exit tickets too. Again giving me a check of who's got it and letting the kids leave the room with a sense of pride and accomplishment as they hang their pennant on the line. And did I mention how amazing my room looks with all this art work plastered up on the walls. Any visitor (and I get a lot of them) makes sure to point it out!


When I give a traditional exit ticket, and end up with a few extra minutes, I will sometimes have the students flip it over and write a reflection about the lesson. Sometimes I will have them draw a picture. On this one, I told the students to draw something they thought I would like. Can you tell that I eat a banana every day during this morning class?!


Or I will have the students draw how they feel after the lesson of the day. This really helps me to build relationships with my students because they will sometimes draw things that make great conversation starters.

Even just having the kids make a quick poster about what they learned or flipping over their worksheet and drawing something to summarize their feelings about the lesson has kept my students engaged and allowed them to use their right brain that is too often ignored in math class. Bring on the creativity! If nothing else, they may just draw something that brightens your day!

Tying Factoring to Graphs

This summer I spent some time re-vamping my lesson about the Zero Product Property and helping students to see the connection between factoring and the zeros of a parabola. This week I finally got to teach the lesson using all my new materials and I couldn't be more excited about how it turned out!


My students had fun learning how to factor , which is obviously important when we extend it to graphs of parabolas. This summer I made these fun doodle notes that I was so excited to try to introduce the Zero Product Property. We factored the problem and set the factors equal to zero and then I asked them to figure out how it was connected to the graph. They were excited to see a real-world application for factoring.


After we finished the first two problems, I had the students talk about the connection between the factors and the x-intercepts. Then they didn't have any trouble working backward given a graph to an equation. I started the students off on the Try It problems by asking them what the 5x^2 and 10x have in common - they sometimes forget GCF when they are so used to trinomials. Then I had the students complete the Try It problems on their own. I asked students to work the problem on the board so their peers could check their work.
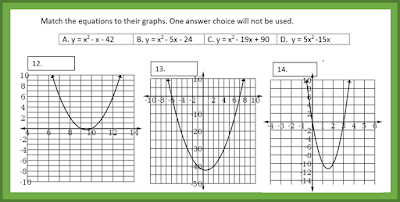
 Then the students completed this dominoes activity, where they have to factor the quadratic equation, set the factors equal to zero and match it to a graph. Once they match the graph, the other side of the domino gives them their next problem. I liked the structure of this, and the ease at which students completed it. I love days were everyone feels successful!

As groups finished, I traded them for this coloring activity. Some students chose to work from the graphs to the equations, and some chose to factor and solve the equations from the answer bank.


My students always love any chance to color. I love seeing them break out their sparkly pens, fancy highlighters, or boxes of colored pencils and add some flair to their work.

I know I did a MUCH better job teaching this concept this year. I just finished grading their Quadratics Test and nearly all of them aced this matching question. That was NOT the case last year, so I'm glad these activities helped them to practice and understand this concept! You can buy a mini-bundle of the three activities included in this post in my TpT store.


Para-bowl-as!

Why is it that so many students insist on pronouncing parabolas as "para-bowl-as"!? I was really excited to jump right in to discovering how factoring ties to parabolas and their graphs, but my students needed some basic vocabulary and graphing practice first. I jogged their memory of input-output table and graphing with a Warm Up of a linear function, then we jumped right into parabolas.
This summer, I made these cool doodle notes about graphing quadratics. {It's always exciting when I get to finally use something that I worked so hard on!} This lesson last year took WAY too long, so I expedited things by giving students an partially filled in input-output table and the parent graph. 

For each section, I would fill in the first row of each input-output table and then set students loose. I would invite one of my early-finishers to graph the parabola on the board, then I would have the students generalize the rule at their tables. Then I would ask them similar questions like : where would the vertex of x^2 +100 be? What about x^2 - 25? Which graph would be wider y = 10x^2 or y =1/4x^2? My students got it - I really liked how they could compare to the parent graph for each one.

I loved watching students make connections as they created their graphs. and how they discovered how changing part of the equation changed the parabola. They also quickly noticed that the output values repeat once they find the vertex.


Then to practice even more, I used this Graphing Quadratics Station Activity from All Things Algebra to continue graphing parabola. I did not have them move around to stations though. We did Graph A together, so that I could review all that fun vocabulary we just learned and remind them about domain and range. The students were in pairs, so they played rock-paper-scissors to see who had to pick up their first card from the back table. I printed the answer key and stapled it to the back of the card. I made sure to emphasize that students who were caught copying would NOT get any points. But I actually loved having the students have the answer key so they could self-check as they went. I heard great questions from my students, like "How did they get this answer?" Or "I see my mistake." I caught only a handful of students copying out of all 140 of my Algebra students, so I was really impressed. Plus my students felt confident in their graphing skills when they could check-in as they went without constantly calling me over to verify their work. When they finished a card, they would do another round of Rock-Paper-Scissors and then head to the back table to swap out the card. 

About 5 minutes before the end of class, I had students draw a large star next to an empty graph spot and complete an exit ticket problem. After class, I sorted them into students who got everything in the problem correct and students that missed part of it. During the next class, I had those with perfect papers help their peers make corrections. I love this quick remediation and empowering my students to teach others.
Next up, we learned how to use the x-intercepts to match equations to their graphs and applies those factoring skills. Check out that lesson here.

Best PD EVER!


This week I had a unique opportunity to observe a superstar teacher in my district. She teaches at a nearby high school, but her school has had amazing results in getting kids to pass the Algebra 1 End of Course Exam (FSA), and she has been leading the pack. I've heard great things about her class so when my AP asked if I wanted to spend the morning there, I jumped at the chance! In nine years of teaching I have been to countless hours of professional development, but this was definitely the most helpful and relevant. I love that I am part of a community of educators who love watching students succeed so much they are willing to take their time to share their best practices, and lifelong learners willing to constantly refine their craft until they find what works best for the students.

It was such a reflective experience to watch someone else teach. She did an amazing job providing real-time remediation to her students via peer tutoring and also spiraling review throughout her warm ups and exit tickets. In the prior class, students completed this exit ticket and then she used it to create groupings for the next class.

I do a lot of group learning and always encourage students to ask their peers for help, but she had a very intentional method of doing this that I am definitely going to use. She had a quick meeting with her peer tutors and each of the three students was assigned two students to help. The two students in each group who were receiving tutoring reworked exit ticket problems on the window (I never thought to use dry-erase markers there!) and then wrote out how to solve it and the steps in words for solving. They they repeated the process with another problem. This helps address misconceptions before they get out of hand. While these students were doing the tutoring cycle, the rest of the class started on the classwork assignment, and she floated around answering questions. As the tutoring groups finished, they started in on the classwork assignment.  I think I sometimes get worried about what it will look like when everyone isn't working on the same thing, but visiting this class showed me that once the students are trained with your expectations, the process can unfold pretty seamlessly.


The next day, I tried it in my classroom. I had students complete a graphing quadratics problem as an exit ticket and then quickly sorted them into students who got it 100% correct and students who missed part of it. I had a few students who messed up completely, and they were the ones I targeted. During the next class, I passed the papers back and the students with stars circulated and helped their peers as the others reworked the problem. I have a ways to go before it unfolds as perfectly as what I saw, but I loved how my students received feedback and had an opportunity for revision. I also loved how empowered the students with stars felt and the great explanations I heard them give their peers.

Similar Triangles

When I taught 7th grade five years ago, it seems like every problem could be solved with a proportion. We spent a lot of time talking about matching up units and ratios when solving a proportion, then we would come to similar triangles and the students wouldn't know what to do, so they would set up their proportion all willy-nilly. So I developed this system for teaching similar figures and I have used it ever since, including just last week when I reviewed similar triangles with my Geometry class.

I have students match up the corresponding sides with shapes. In the picture below XY corresponds with MN, so we drew a cloud around those side length. ZX corresponds to NP, so we drew a box around those side lengths. Then when we set up our proportion, we make sure that the corresponding sides are neighbors and the side lengths in the same triangle are neighbors - either one on top of the other or next to each other. I make sure they know that "neighbors" does not include diagonally.
Matching the side lengths up like this really helps the students to visualize the proportion. If we have markers handy, we use those too, but I know when they take their assessments, they will not have markers or highlighters so drawing the shapes around the numbers will always work.
Since I know similar triangles is so heavily covered in middle school, I covered it pretty quickly with my Honors Geometry class. They did great setting up the proportions after we talked about how to place the numbers. 

We did some problems with algebraic expressions for side lengths and some problems with multiple variables.
 And the standard shadow and mirror problems as well as some nested similar triangles.

I LOVE these doodle notes from Math Giraffe. They were a perfect way to introduce the Triangle Similarity Shortcuts, which are really easy for my students since we spent so much time on congruent triangles. 

On Day 3, we took some notes about proportions in triangles and then practiced all types of similar triangles problems with some book work.
Then I tried something new for this mini-unit. I gave them a partner quiz. I told them they had to agree on an answer. I heard some AWESOME discussions while students were doing this. They were really working together well because they had a quiz grade riding on it. They did so well - I may have to try another partner quiz, plus it cut my grading in half ;) 


Free Factoring Fun


I remember the first time someone showed me a Diamond Problem - a cool math puzzle that transformed factoring from something scary into something fun. I showed my students an example and had them create the algorithm. Before they knew it, they were slaying factoring problems.

Then we would review for the EOC, the students would see a factoring problem and get excited because they could answer it with a diamond problem. But I would hear the same question over and over, "Where do the numbers go in the diamond?" It was interesting because they knew they wanted factors that multiply to the constant and add to the middle term, but they were so hung up properly arranging them in the diamond that they got stuck.

As the factoring unit approaches this year, I thought back to my beloved diamond problem and how my students were confused about something that didn't matter, and I made the difficult decision to nix the diamond.

I found this great {free} PowerPoint game from Scaffolded Math and Science. It got the students thinking about numbers just like the diamond problems did. They loved the game format, and I even offered some candy to the first correct answer just to up the engagement even more.

Then I showed them a problem with two binomials in factored and simplified form and asked them to think about how the numbers were connected. I had them put their thumb up when they saw the connection and it was amazing how fast the wheels started turning.
Here is how I had them organize the information and it worked out just as easily as a diamond problem. They knew what the product and sum of the numbers needed to be without any confusion.

We filled out this table, and I love helped them to see the connection between factoring and distributing.

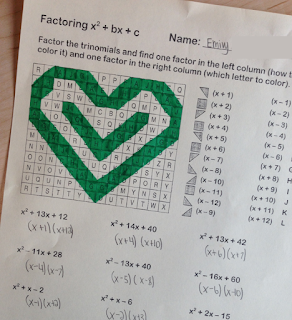
I love this {free} Search and Shade activity to practice. The heart is super timely if you are Factoring right now, but they can celebrate their love for factoring anytime ;)

Now we know the real fun comes when you change the leading coefficient. Stay tuned to see how it goes ...
Related Posts Plugin for WordPress, Blogger...