Inequalities Ideas


My students had such a good handle on equations that Inequalities was pretty much a breeze. I started with the discussion of the prefix in- , which most of my students could tell me meant not, and how these problems would not have an equals sign. I talked about how they would have a whole solution set instead.


We started with this foldable, a freebie in my TPT store! It was easily the most referenced notes in this unit. I loved watching the students flip back and look at it as we worked through the unit. We did a few notes about how to write a inequality from a number line and vice versa. Several students pointed out the trick about the inequality being an arrow showing where to shade, and I asked then if there was a difference between x>1 and 1>x, since both arrows points the same way. I told them that instead of memorizing a trick, they should think about which direction would make the inequality true or test a number to figure out how to shade. Nix the Tricks, boys and girls, and make math make sense! Every since time I graphed an inequality (and it was a lot over five sections of Algebra for four class periods), I talked through how to figure out which direction to shade an never once did I mention this trick, so hopefully they forgot it ;)

Day 2 we started off with some simple inequalities word problems - I love starting with word problems, and I have found that this year my students are not so afraid of them because we have been tackling word problems since day one. We also have fun using highlighters to pick out key words from the problems. I then introduced the key difference between inequalities and equations - if you divide by a negative, you flip the inequality symbol. We talked about why and then did some examples in "To Flip or Not To Flip." I liked these examples because my students often overgeneralize and just assume that if the problem involves a negative number, they flip the sign. These examples helped them to see when to flip and when not to flip.


For classwork, we did this matching activity by Amazing Mathematics that I loved! You start with a word problem and then match it to the inequality (I saw a lot of students using their foldables for this), then solve it, then graph it.

The students were a little overwhelmed at first, but they worked together to conquer. I told them everyone doesn't have to work out every problem, but you all have to agree on the work. This lead to some great discussions when someone had an answer that a group member wanted. This was a great activity with awesome discussions, teamwork and inequalities practice.

The next day we took on some Multi-Step Inequalities, including special solutions. Students practiced with this Tarsia Puzzle.

I love these collaborative puzzles for practice, especially for something like this where students can easily make little errors. When they don't find their answer, they are forced to re-examine their work or possibly the work of their peer - I hear such great discussions from this, that I never hear when students are working on a worksheet or textbook problems.
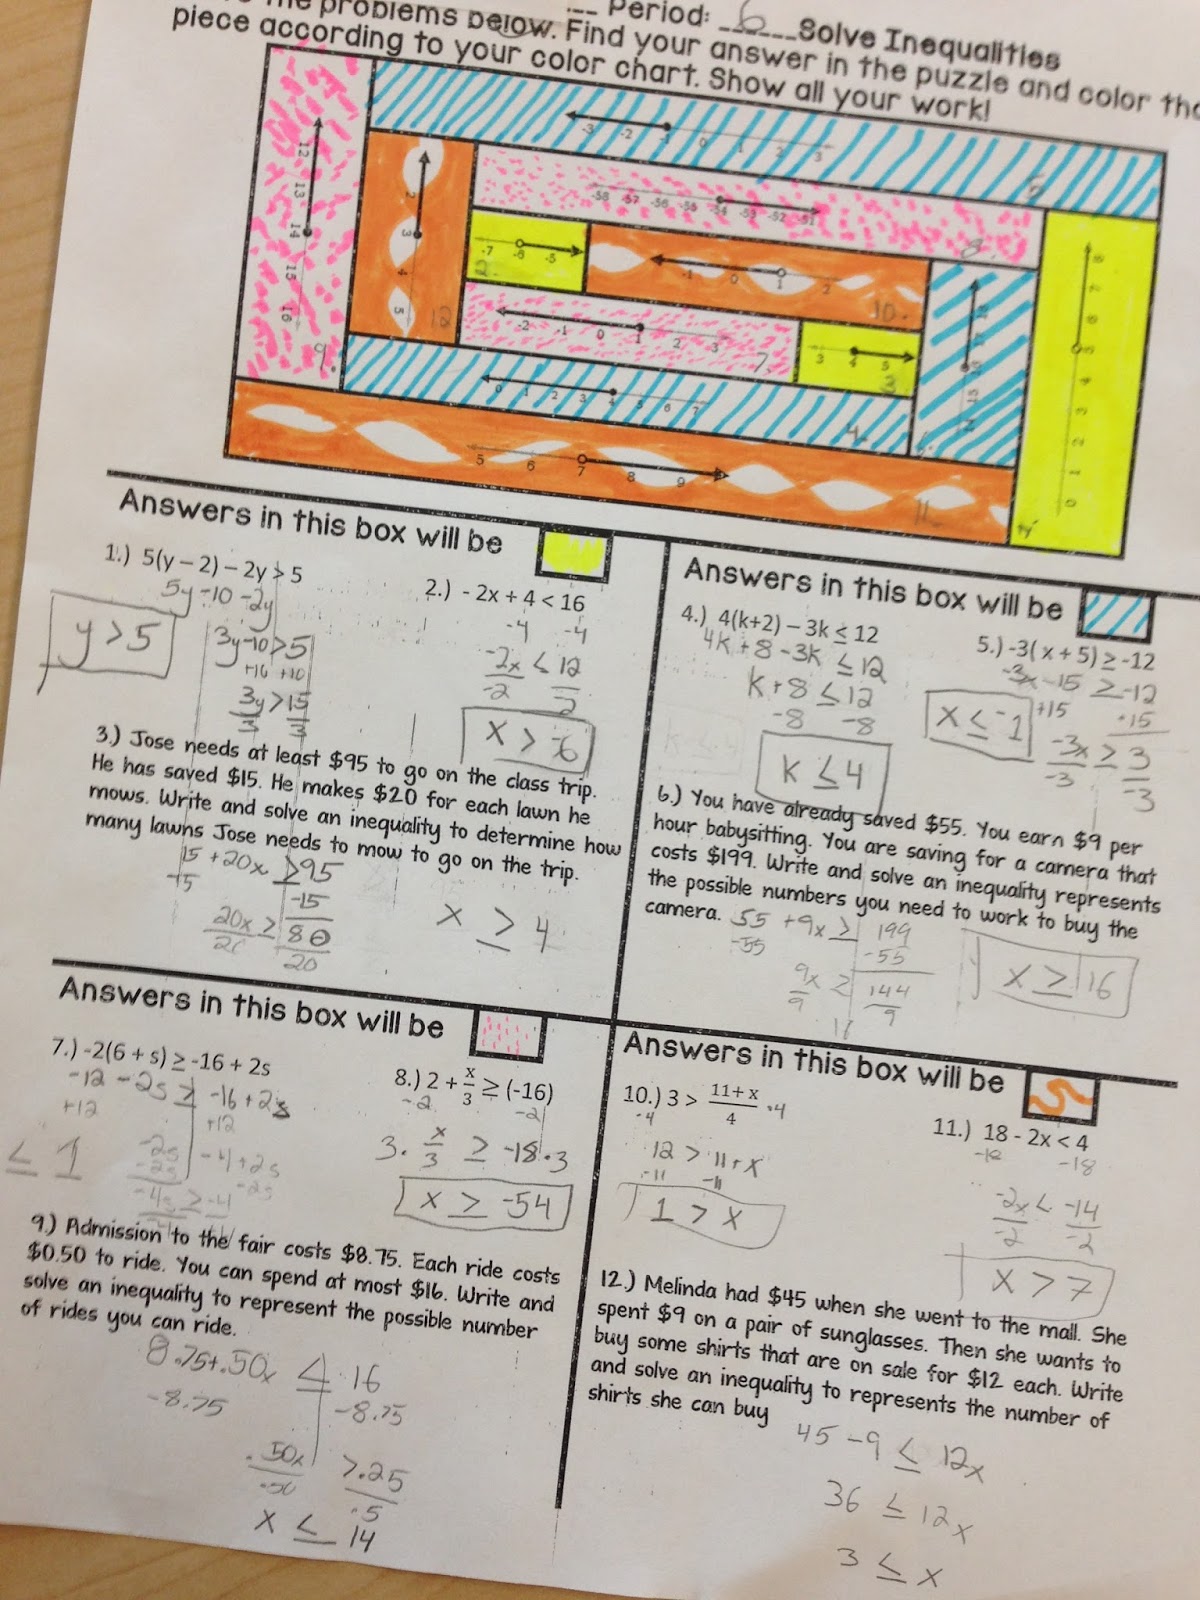
When they finished, they started on this coloring activity that they finished up for homework. It also helped them to study for their quiz, which was today. From what I have graded so far, they did really well. After the quiz, I had my best lesson yet on compound inequalities. I really wanted to focus on preparing them for writing compound inequalities for domain and range. We did this problem, from Algebra Nation, with an answer bank. Giving students an answer bank really helped them to break down this task and think about how to represent situations with compound inequalities.

Then I did this activity, which may be one of my favorite things yet. They graph compound inequalities from parking signs based on when cars CAN park.
 I loved how this made a concept that is usually tricky for my students into something relevant and fun. Speaking of fun, on to "fun"-ctions next! 

How my students discovered the distance formula

My focus in geometry has been on conceptual understanding, so in introducing distance formula, I wanted to make sure students understood the why. It took me two days, but my students have really grasped this concept, so I am very proud of them.

I started with a review of Pythagorean Theorem. We reviewed the puzzle and did some practice with this Tarsia puzzle {a freebie in my TpT store!}

My students did these pennants from Scaffolded Math and Science, which have awesome questions to get kids thinking about Pythagorean Theorem (and they look great as classroom decor). I love the questions that start my giving students the area of the right triangle a side length and ask them to work backwards to the side lengths. I also love that this student made Pythagoras a red head - like me :)


Once we had the mechanics of the Pythagorean Theorem ironed out, we put it onto a coordinate plane. We graphed two points and I asked students if they could see a way to apply the Pythagorean Theorem. We had a great discussion about how it didn't matter if you drew the right triangle above or below the segment. One student even pointed out, "You are always going to be missing the hypotenuse because you can't count the diagonal distance." (Which I was SO excited to hear a student articulate. I can't tell you how many times I have seen students try to count diagonally across the graph.) We did two examples in their INBs and then I gave them this Distance Formula Maze. I printed them one 1/4 of a page and attached graphs to the sheet. I told them to complete the first five problems using Pythagorean Theorem and then stop.


As they worked, I asked them to think about whether they could do this problem without a graph and what that would look like. I also told them I would give a Dum-Dum to any really good answers, so that got students extra motivated. One student said, "Draw a graph!" I told him that would be a great strategy on the EOC, but I wanted them to try it without graphing anything, so they went back to thinking.

One student called me over and said, "Couldn't you just find the difference between the y-values and x-values in your ordered pairs and then use those numbers to do Pythagorean Theorem?" I asked her to prove this would work with an example she already did, so she looked a problem one, where she found the distance between (4,7) and (8,-5). She said, "Well 7 - (-5) is 12, so ... oh look, that's the same as the length of the leg. And 8-4 is 4 - so I think that would work." Then another student called me over and said, "This reminds me of learning about slope in Algebra class and this formula  y2-y1 / x2-x1. Expect you wouldn't want to divide them at the end." I was so excited  - here were my students coming up with ideas and connecting to prior knowledge all on their own. We flushed out these ideas with a group discussion and came up with the distance formula. They saw the connection between Pythagorean Theorem and the Distance Formula and my textbook has this cool graphic that helps really make that connection.


Then we did some examples and I sent them back to their maze. I told them to try our new formula for the next five and then they could finish any way they wanted.

As students practiced, they started to favor one or the other. A few clever students came up with a hybrid of their own. One student was so proud he called me over and asked if it was OK for him to make up his own distance formula. I was intrigued, so he demonstrated with the points (1, -4) and (7, -1). He drew a table to help him find the distance between the x and y-values and then plugged those numbers into Pythagorean Theorem. Talk about taking ownership of your learning!

Our next lesson was midpoint, which I used my fan lesson that I blogged about here. Again, the students understood what they were doing. Today, I gave them this mini quiz with a tough Check All That Apply problem, and they nailed it! Discovery learning and conceptual understanding
for the win!

Open House: Why I made the PARENTS do math


One of the LONGEST days of the school year is Open House. School is from 7:05-2:25 and then Open House is from 5:30-7:45. The window between allows for just enough time to leave campus and get caught in rush hour traffic or stay on campus and go stir crazy!


Our parents follow their students schedule to "get a glimpse of their students' day," with the bell ringing every 10 minutes. In years past, I have talked about the syllabus and the course, but this year I started to think about how I really wanted the parents to know what it would be like to sit in my Algebra 1 class - so I made them do math!


We do A LOT of puzzles in my class - it's my favorite practice structure. So far this year we have done Solving Equations with Symbols (on the first day of school) and Distribute and Combine Like Terms to Solve Equations. Most of my parents drag their teenagers along  bring their child with them, so I greeted the child at the door and asked them to explain the puzzle to their parents. Just like in class, how I have students explain things to their peers. I had the picture of the finished puzzle on the board. Some parents were reluctant to start, but so are some of my students, and with a little encouragement, they saw that they can do it. The puzzle is a simple one that reviews multiplication tables, so it's not math that was too complicated, but engaging in this activity allowed them to truly experience my class as a student.

The parents had fun, they talked with their children and other parents and worked together (just like their students). They celebrated when they completed the puzzle (just like we do in class), and they made and corrected errors (do you spy one in the pic above?). Most importantly, the parents saw that math - at least in my classroom - isn't something to be scared of. 

After they finished the puzzle (it took less than four minutes), I had plenty of time to review the important information about my class - my contact information, the dates of the state EOC, my homework policy, tutoring schedule, etc. Students who came with their parents earned a free homework pass!


At the end of the night, my feet and legs ached, and I left knowing that I would be right back in that classroom in less than 11 hours. I had two parents ask if they could take a copy of the puzzle home to do again with their student or younger student, three parents tell me their students have told them that I am the best math teacher they have ever had, and I had classes full of engaged parents, who maybe after their 10 minutes in my class, are a little less afraid of math.

Lovin' Literal Equations

Literal Equations was always one of my least favorite topics. The kids were so confused and bored by it. Then I was always kicking myself during our linear functions unit when they could not re-write an equation in slope-intercept form. Last year, I tried this problem when reviewing before the EOC and my students did really well with it.


So this year, I decided to expand on that idea with these doodle notes! I had already introduced variables with symbols on the first day of school, so they quickly saw that the symbols represented variables. But after we did a few examples with the symbols, I saw a lot less errors like 2x+5=7x - and if they did make that error, I could say, "Remember what happened when we did bell minus raindrop - we couldn't actually do that, right? Just like you can't add 5 to 2x."


When I displayed this problem, I asked, "What makes this equation different than the other two?" and students pointed out the "numbers" and "two planes," which we translated into coefficients and like terms.


This also led to good discussion of how you do not need like terms to divide (or multiply).

We did a few more examples until I felt like students understood how to use solve them and then I presented this "Check all that apply" question type. I love multiple-part questions like this that require them to work out several different problems. They had to determine which equations where solved correctly for the indicated variable. This led to some great discussions


Then it was time to practice. Amanda, at Free to Discover, had this awesome Solving Literal Equations Scavenger Hunt, and I was excited to try it out! I hung the 12 problems all around my room and students took their notebook around with them and solved. I loved how these problems really challenged students because several had similar answers.

The product has a work sheet that students can use, but I like having students record their work in a notebook. So, I made a 1x12 table and printed them so students could keep track of their path (using the symbols in the corner). This made it super easy for me to check their work and help set them back on track if they made a mistake.

My admin is still in the process of balancing classes, and my 4th period has 36 students. We make it work with clipboards and folding chairs, but the idea of 36 kids walking around made me a little nervous, so I printed the sheets 4 per page and made a little stacking activity. The students didn't miss out on the rich practice, and I kept my sanity.

I also had one class that was not ready for the problem that required them to factor a GCF, so I just wrote a Post-It on it that said, "Free answer - head to __" and gave them the next picture.

I feel like this lesson was very successful. It helped students with the process of solving equations and I know I will be glad I took the extra time early when we get to linear functions next month.

I hope you find something here the you can use in your classroom too! :)


Solving Equations Activities Round Up

We are now in Week 4 of the school year and my Algebra students have been hard at work solving equations. I've told them that Algebra is a house that is built on the foundation of being able to solve equations, so I want to make sure they have a strong foundation. I have so many fun activities for this unit - I don't want it to end!

First I introduce them to the idea of an equation on the first day of school, with this puzzle. I loved the hearts instead of variables and that all the equations can be solved with mental math. In fact, I told them they were not allowed to write anything down, which lead to some great group discussions.

On Day 2, I introduced the Properties of Equality with these fun notes for their interactive notebooks

Then we practiced solving two-step equations with this flower coloring activity. I always love hanging these on my walls because of the great variety in colors students choose. 


I also did not let them use a calculator, but they could use this cool number line that folds out of their INB from Math=Love or the big number line in front of my classroom.


Day 3, I reminded them about like terms with these awesome doodle notes from Math Giraffe. I printed them two-per page so they fit perfectly in their INBs. I have been making sure to tell students that they should take the time to doodle, add color and pizzazz to their notes. It's fun to see them take pride in their work. I was very proud of my Algebra INBs last year, but this year's are already better!


The students practiced solving equations with the distributive property and combining like terms with this puzzle. I love activities like this because students must work together to finish it. They strategize and problem solve and are able to self-check their work when their answer doesn't match one of the puzzle pieces left. These puzzles are my favorite practice activity!


Day 4 we looked at the difference between combining like terms and variables on both sides of the equals sign. I tried this zombie flip book, and the students loved it! The story is really cute about a zombie appocolypse at school - teenagers + zombies = instant engagement! I made enough books for each group of three to have one and I told them they could not move on until everyone agreed on an answer. I love that students received immediate feedback as they worked their way through the story. If they made a mistake they were eaten by zombies! I had some groups finished and then at the end of the work period, I told everyone to turn to p. 37, and they answered two more problems and escaped.

 We then talked about special solutions with this fun activity. I have used this one for three years now and it's a favorite - I love their discussions about scale #3. Then we talk about it, and they get a little mad when I tell them the answer is "no solution." We worked out problems with no solution and infinite solutions and I had them draw the scales to represent the problems so they had a visual of why the answers are no solution and infinite solutions.


The district made us give a baseline assessment on the fifth day of school, and I had students work on this coloring activity when they finished.


There has been a lot of shuffling of students to try to balance classes and make sure all students are in the right classes, so I decided to do a day of review next. We worked on some multi-step equations and word problems. I gave them this fun phone for their notebook and the mnemonic device "Don't Call Me After Midnight" to remember the order to isolate the variable. (More than one student put the 'phone' to their ear and pretended to make a call).


Then students completed a Versatiles activity. These are another one of my favorite ways to practice. I can easily create an activity from 12 problems and an answer key and the students place the tiles in the answer slots as they work. If they get all the answers right, their tiles make a picture when they flip it. If not, they can easily see their mistakes and go back to those problems. And I can make a TON of different patterns [to keep students on their toes ;)]

Next we worked on solving equations with proportions. I loved these examples from my textbook where students have to pick out the proportions that are set up correctly or incorrectly. I always make students write out the units so avoid making an error in setting up the proportion. We practicing solving equations with proportions with this fun maze activity from Amazing Mathematics. The self-checking aspect is so important to me when students are practicing so that they do not continue to make errors. They know when their answer doesn't match that they need to stop and ask for help from a peer or me. Each correct answer leads them one step closer to solving the maze.

My plan for Friday was to start literal equations, but Hurricane Hermine came to town and our entire district (and a lot of Florida) had our first "Weather Day." The hurricane had excellent timing for a four day weekend for us and we had no more damage than a rainy day. 


First day of school times 2

The first day of school is so exhausting! And in high school, we follow an A-B schedule, so I get to do it twice! It's important to me that the students do math even from the first day, and I love teaching rituals and routines in the context of the lesson.

The best compliment came from one of my students in the last period of the day who told me, "I think I am going to like this class - it's the first time all day I've done something besides listen to my teacher talk about a syllabus!"

 We started off with this puzzle. I LOVE using these types of puzzles in my classroom - they are self checking and encourage problem solving and teamwork. I told students they were not allowed to write anything or use a calculator. They had to talk about their answers. I love all the different hearts- so much less intimidating than a variable for day 1. I enjoyed listening to students talk through these, make mistakes and problem solve to fix them. Plus, my students thought it was fun - win for everyone.

Since we had the team work mojo flowing, we went right into this Broken Circles Activity from Math=Love (She has free downloads for all group sizes, copies of the rules, and reflection questions).


My desks are grouped in threes, so I first had them complete it in groups of three, but I later discovered that the activity is way more fun in a bigger group. Each student has to make his/her own circle, but they have to do it in complete silence. I loved that the A pieces went right together to make a circle and that student was looking at the other two, thinking "What is wrong with you guys?" Try as Person B and C might, their pieces could not make a circle - I did have to clarify that I had not just cut the pieces poorly. When the students realized they had to work together, and A had to share his/her pieces, the circles fit together nicely. Sarah had some great reflection questions too and students did a great job identifying the ideas of teamwork and collaboration.

Finally, it was time for some colorful fun - this Back To School Pennant! There are directions for a glyph and students color it based on their favorite class, favorite season, number of siblings, and birth month. One student asked me, "What months are considered 'Fall'?" To be fair, the weather here in Florida doesn't change too much, but when I told him fall would be September, October, and November, he said, "Oh, football season! Well then that's definitely my favorite!" These pennants looks awesome. Not only was this activity fun for getting to know the students, it reinforced the idea of taking pride in your work. I told them to treat every assignment like it will be hung in a museum - take your time and do it right.


My classroom!


When I was little I would love to play school in my basement. I would decorate the wall, write on the board, and play with my school supplies - and that is exactly what pre-planning always feels like - playing school. [Of course when I played school in my basement, I never had to sit through a two-and-a-half-hour faculty meeting ;)] After a week of pre-planning I finally feel a little organized and definitely excited to start a new school year. This will be my 9th year teaching, but I am still a little nervous, anxious, and excited about meeting the students Monday. I wonder if that ever goes away!

First the "before" pictures - classroom disaster! That is the contents falling out of my storage cabinet from when they moved it to wash the floors under it. And the entire contents of all the bookshelves in the room was piled on my desk. I definitely had some work to do.


I am grouping my desks in threes this year. Last year I started with pairs and moved to groups of 4, but someone always complained about having to sit with their back to the board, so I think groups of 3 will fix this problem. I would have two groups join to make a foursome for group work last year, but this year, we will eliminate that by always being in a group of 3. I think this will provide for great interaction. 


I love the number line across the top of my board - students reference it all the time!
 I also love writing the date as a math problem, and reciting that math problem when someone asks me the date. Students usually get excited to help me change this every day.

 I have these dry erase board (actually showerboard from the hardware store) in two spots in my room to have students work out problems. Sometime students are more willing to take risks when they don't have to be "in front" of the class. These are on the side walls. Also featured - my laptop cart. I am super excited to try these digital activities this year!

I mostly like to start the year with bare walls and let my students decorate it with their work. Research from books and my years in the classroom tell me they are much more likely to look at it if they created it. I do like to have a few anchor charts around the room though, and I find that if I make a point of referring to them in instruction and answering questions, then my students start to as well. I LOVE this Algebra 1 Word Wall from Scaffolded Math and Science. It has prime real estate right between my windows this hopes that students learn everything on here about linear functions.

The 8 standards for mathematical practice. It's a freebie I picked up here. I love that they are written in student friendly "I Can" statements, and I can easily reference them as well, like "Make sure you attend to precision."


So wise Yoda is. Thanks Target Dollar Spot!


I LOVE this "Math-y" Welcome sign that Sarah from Math=Love shared.

 My pencil cup with some worn down pencils. This is where I keep the freebies and then when it gets low I offer free upgrades to refill it. You can read more about that here!
 My student station for INB supplies. I also keep extra copies of any handouts on that back table for anyone tardy - they know to check there if they come in late.
 These boxes are so organized - hopefully they stay that way once the students get their hands on them!

 I LOVE this hack I found on Pinterest to keep my cords organized. The binder clip hooks on the side of my desk and my projector cord is attached so I can easily connect it to my doc cam or laptop.
Ready or not - the kiddos come in tomorrow! If nothing else, at least my room looks nice ;)
Related Posts Plugin for WordPress, Blogger...